
Nightstand Sticky Residue Removal: The Complete Safe Cleaning Guide
Sticker marks, tape residue, and stubborn adhesive left behind on your nightstand can ruin its finish and attract dust. Learn how to remove sticky residue safely from wood, metal, glass, and painted surfaces — without damaging the material.
Jump to Removal MethodsWhy sticky residue happens: Price tags, shipping labels, adhesive pads, and craft stickers all leave behind a tacky film once removed. On a nightstand, this residue not only looks unsightly but also traps dust, pet hair, and lint — making your bedside surface feel perpetually dirty. The good news is that with the right method for your nightstand's material, you can remove adhesive residue completely without sanding, repainting, or refinishing.
Understanding Sticky Residue on Nightstands
Before you reach for a cleaning product, it helps to identify what you're dealing with. Sticky residue on nightstands generally falls into three categories, each requiring a slightly different approach. Knowing the type of adhesive — and the type of surface it's stuck to — is the single most important step in avoiding damage to your furniture.
🧴 Rubber-Based Adhesive
Found on price tags, masking tape, and removable hooks. It feels gummy and stretches when you try to rub it off.
- Most common residue type
- Responds well to gentle heat
- Often removable with oil or alcohol
🔬 Acrylic-Based Adhesive
Used on permanent labels, shipping stickers, and double-sided foam tape. It cures hard and can leave a dry, crusty film.
- Harder to remove than rubber adhesive
- Requires solvent-based remover
- May need repeated applications
🌿 Natural Residue
Sap, tree resin, or food residue that has dried onto the surface. Often mistaken for adhesive but behaves differently.
- Common on secondhand nightstands
- Softens with warm water and soap
- May leave a stain behind
Match Your Method to Your Nightstand Material
The biggest mistake people make is using the same adhesive remover on every surface. A solvent that works wonders on glass can strip the finish right off a lacquered wood nightstand. Use the table below to identify the safest approach for your specific nightstand material. If you are unsure what your nightstand is made of, review our guide on solid wood vs veneer nightstands to identify your furniture's construction.
| Nightstand Material | Safest Method | Method to Avoid |
|---|---|---|
| Sealed Solid Wood | Warm water + dish soap, then mineral oil | Acetone, harsh solvents |
| Veneer / Engineered Wood | Hair dryer heat + plastic scraper | Excess moisture, soaking |
| Painted / Lacquered | Rubbing alcohol on a cloth | Acetone, abrasive pads |
| Metal (Steel, Iron) | WD-40 or Goo Gone | Steel wool on plated finishes |
| Glass Tops | Razor blade + glass cleaner | Nothing — glass is forgiving |
| Marble / Stone Tops | Plastic scraper + mild soap | Acidic cleaners, vinegar |
| Upholstered Surfaces | Adhesive remover spray + soft brush | Soaking the fabric |
⚠️ Important: Never use acetone, nail polish remover, or paint thinner on painted, lacquered, or veneered nightstands. These solvents can dissolve the finish in seconds, leaving a permanent dull spot that requires professional repair. If your nightstand has a factory finish, always test any liquid remover on the bottom edge or back panel first.
Recommended Products for Sticky Residue Removal
⚠️ AFFILIATE DISCLOSURE: This website contains affiliate links. As an affiliate Associate, we earn from qualifying purchases. If you make a purchase through these links, we may receive a small commission at no additional cost to you. Read our full affiliate policy.
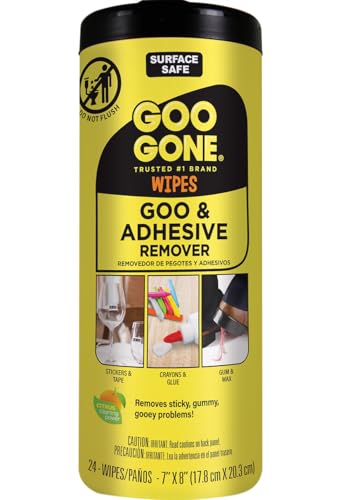
Goo Gone Clean Up Wipes Adhesive Remover - 24 Count - Removes Adhesive Residue Labels Stickers Crayon Tree Sap Gum Masking Tape Glue and More
Check price on Amazon
Max Strip Adhesive, Tape & Glue Remover Spray, Multi-Surface, 22 fl oz | Safely removes sticky tape residue, carpet glue, decals, tree sap, gum & stickers from wood, metal & glass.
Check price on Amazon
Adhesive Remover Spray, Goo & Glue Remover, Quickly Dissolves Glue & Sticky Residue, Surface Safe for Car, Glass, Windows & Floors, Removes Stickers, Labels, Tape, Decals, Gum & Wax, 6.8 fl oz (200ml)
Check price on Amazon
Magnetic Cable Clips 12 Pack, Self-Adhesive Cord Holders for Desk and Nightstand – Under Desk Cable Management Organizer with No Residue Removal for Home Office, Car, Wall
Check price on Amazon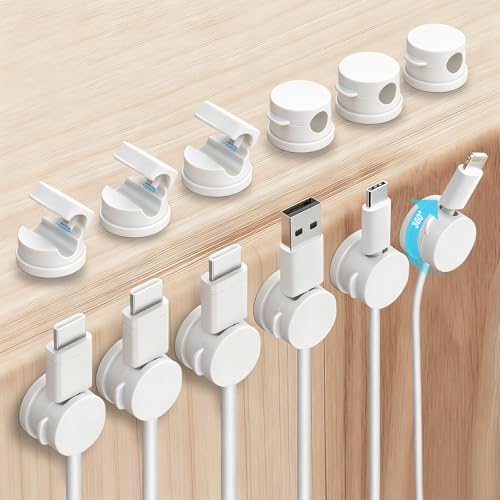
12 Pack Rotatable Spring Cable Management Cable Clips for Phone Charger | Residue-Free Adhesive Cord Holder for Nightstand, Desk, Home, Office, Car, Game Station, Apartment, Adjustable Cord Organizer
Check price on Amazon
6-Pack Rotatable Cord Holder for Nightstand, LISEN 360°Rotating Magnetic Clips, No-Residue Adhesive Cable Management Clips Neatly for Nightstand, Desk, Home, Office, Car, Cubicle Accessories, White
Check price on Amazon
12 Pcs Adhesive Cable Clips, Tpr Wire Organizer System | Tpr Material, Removable without Residue, Strong Sticky Backing, for Home Office Use
Check price on Amazon
12 Pack Magnetic Cord Organizer White, Adhesive USB Cable Clips | Fast Locking Holders Grip Phone Charger Cords - Sticky Backs Stay Put on a Desk, Nightstand, Wall, Car Console, and Headboard
Check price on AmazonStep-by-Step Removal Methods
Below are the most effective methods for nightstand sticky residue removal, ordered from gentlest to strongest. Always start with the mildest approach and escalate only if the residue persists. This protects your nightstand's finish while still getting the job done. If your nightstand is a recent purchase, check our new nightstand releases to see if other owners have reported similar adhesive issues.
Method 1: The Warm Water & Dish Soap Approach
Best for: Fresh residue, sealed wood, painted surfaces, and lightly soiled nightstands.
- Mix a few drops of mild dish soap into a bowl of warm (not hot) water.
- Dip a microfiber cloth into the solution and wring it out until it's damp, not dripping.
- Press the cloth against the sticky area for 30–60 seconds to let the warmth soften the adhesive.
- Wipe gently in a circular motion. The residue should begin to lift onto the cloth.
- Rinse with a clean damp cloth and dry immediately with a soft towel.
Method 2: The Hair Dryer Heat Technique
Best for: Thick adhesive, sticker backing, and veneer surfaces where moisture is risky.
- Set your hair dryer to its lowest heat setting and hold it 6–8 inches from the residue.
- Move the dryer back and forth for 30–45 seconds. The adhesive will become pliable and soft.
- Immediately use a plastic scraper or an old credit card to lift the softened residue.
- Wipe away the lifted adhesive with a dry paper towel before it re-hardens.
- Repeat as needed for stubborn patches. Never hold the dryer in one spot for too long.
Method 3: Rubbing Alcohol for Painted & Lacquered Surfaces
Best for: Painted nightstands, lacquered finishes, and acrylic-based adhesive.
- Pour a small amount of 70% isopropyl rubbing alcohol onto a clean microfiber cloth.
- Do not pour alcohol directly onto the nightstand surface.
- Press the cloth against the sticky spot and hold for 20–30 seconds.
- Rub gently in small circles. The residue will break down and transfer to the cloth.
- Wipe with a damp cloth, then dry immediately. Condition the finish if needed.
Method 4: Oil-Based Removal for Wood Surfaces
Best for: Solid wood nightstands, especially those with an oiled or waxed finish.
- Apply a few drops of mineral oil, baby oil, or olive oil to a soft cloth.
- Rub the oil into the sticky residue in a circular motion for 1–2 minutes.
- The oil breaks the adhesive bond, allowing the residue to slide off the surface.
- Wipe away the loosened residue with a clean dry cloth.
- Remove any remaining oil film with a mild soapy solution, then dry completely.
Method 5: Commercial Adhesive Removers
Best for: Stubborn acrylic adhesive, metal nightstands, and glass tops.
- Choose a citrus-based remover like Goo Gone or a dedicated adhesive solvent.
- Test on an inconspicuous area first — especially on painted or veneered surfaces.
- Apply a small amount to a cloth, not directly to the nightstand.
- Let it sit for 1–2 minutes to penetrate the adhesive.
- Wipe away the residue, then clean the surface with soap and water to remove any oily film.
After Removal: Protecting Your Nightstand
Once the sticky residue is gone, your nightstand's surface is temporarily more vulnerable — especially if you used alcohol or a commercial solvent. This is the ideal time to apply a protective layer. For wood nightstands, a quality furniture wax or a penetrating oil will restore sheen and add a barrier against future adhesive. If you want a longer-lasting solution, consider applying a thin coat of polyurethane or a wipe-on sealant. Our wood sealant guide walks you through the best options for different wood types and finishes.
For painted nightstands, a light coat of clear furniture wax will help prevent future stickers and tape from bonding as aggressively. Metal nightstands benefit from a thin layer of machine oil or a specialized metal polish. And for glass tops, a standard glass sealant will make future adhesive removal significantly easier. If you recently bought a secondhand nightstand and are dealing with multiple residue spots, our secondhand nightstand buying guide covers what to inspect and how to restore pre-owned furniture.
Preventing Future Sticky Residue
The best residue removal is the residue you never have to deal with. A few simple habits can keep your nightstand surface clean and adhesive-free:
🏷️ Remove Labels Immediately
Don't let price tags or shipping labels sit for weeks. The longer adhesive cures, the harder it is to remove. Peel slowly and at a low angle.
🧴 Use Removable Adhesives
When attaching cable clips or decor, choose removable mounting putty or damage-free hanging strips instead of permanent tape.
🛡️ Apply a Protective Finish
A coat of wax, sealant, or polish creates a barrier that prevents adhesive from bonding directly to the surface.
🧽 Wipe Weekly
A quick weekly dust and wipe-down prevents residue from accumulating and makes any future sticky spot easier to remove.
Frequently Asked Questions
Can I use vinegar to remove sticky residue from my nightstand?
Will Goo Gone damage my nightstand's finish?
How do I remove sticky residue from a white nightstand without leaving a stain?
What should I do if the sticky residue won't come off?
Is it safe to use a razor blade on glass nightstand tops?
How can I tell if my nightstand is solid wood or veneer?
Related Nightstand Care & Buying Guides
Sticky residue removal is just one part of keeping your nightstand in top condition. Explore our other expert guides to build a complete bedside care and styling routine.
Your Nightstand Deserves a Clean Slate
Sticky residue doesn't have to be permanent. With the right method for your nightstand's material — and a little patience — you can restore a clean, smooth surface in under 15 minutes. Start with the gentlest approach, test on a hidden area, and never rush with harsh solvents. Once the residue is gone, take a few minutes to apply a protective finish so the next sticker, tag, or tape lifts off effortlessly.
If you're still shopping for a new nightstand, our team has tested and reviewed dozens of options across every price point and style. Browse our highest rated nightstands and editor's choice picks to find a bedside table that is as easy to maintain as it is beautiful. And if you're specifically looking for a nightstand with a built-in charging station or smart features, don't miss our roundup of floating nightstands with charging stations.