
Nightstand Leg Restoration: Repair, Refinish & Stabilize
Don't replace your bedside table—restore it. Learn how to fix wobbly legs, repair scratches, refinish wood, and bring your nightstand back to life.
START RESTORINGWhy Restore Instead of Replace? Nightstand legs endure daily wear—they get kicked, dragged, and exposed to moisture. Whether your legs are wobbly, scratched, or simply tired-looking, restoration is often cheaper and more sustainable than buying new. This guide walks you through every step, from diagnosing the problem to applying the final finish. For a broader look at maintaining your entire nightstand, explore our nightstand care and maintenance hub.
Diagnosing Common Nightstand Leg Problems
Before you start any restoration work, you need to identify what's actually wrong. Nightstand leg issues generally fall into four categories: structural instability, surface damage, finish degradation, and material-specific problems. Understanding the root cause ensures you apply the right fix and avoid making things worse.
🪵 Wobbly or Loose Legs
This is the most common complaint. It usually stems from loose screws, worn joints, or a missing glide. If your nightstand rocks or feels unstable, check the attachment points first. For a deeper dive into leg styles and how they attach, see our nightstand leg styles guide.
🪚 Scratches & Gouges
Pets, vacuum cleaners, and moving furniture all leave their mark. Surface scratches are cosmetic but can expose raw wood to moisture. Catching them early with a scratch touch-up prevents further damage.
💧 Water Rings & Stains
Spilled water or hot coffee cups can leave unsightly rings on wood legs. These are often fixable with gentle heat or polish. Learn the full method in our water ring removal guide.
🔩 Broken or Missing Hardware
Stripped screws, broken bolts, or missing glides make legs unstable. If the hardware is beyond saving, replacement is straightforward. Check our nightstand screw types resource to find the right match.
Essential Tools & Materials for Leg Restoration
You don't need a full workshop to restore nightstand legs. Most projects require only basic hand tools and a few specialized supplies. Here's what to gather before you begin:
| Tool / Material | Purpose | Estimated Cost |
|---|---|---|
| Screwdriver Set (Phillips & Flathead) | Tightening or removing leg attachment screws | $15–$30 |
| Wood Glue (PVA or Polyurethane) | Reinforcing loose joints and cracks | $5–$12 |
| Fine Sandpaper (120, 220, 400 grit) | Smoothing scratches and preparing surfaces | $8–$15 |
| Wood Filler (Stainable) | Filling deep gouges and holes | $6–$14 |
| Touch-Up Marker or Wax Stick | Quick fixes for minor scratches | $5–$10 |
| Furniture Glides (Felt or Plastic) | Protecting floors and improving stability | $4–$10 |
| Wood Stain or Paint | Refinishing bare or discolored wood | $10–$25 |
| Clear Finish (Polyurethane, Lacquer, or Wax) | Sealing and protecting the restored surface | $12–$30 |
| Clamps (Bar or Spring) | Holding glued joints tight while drying | $15–$40 |
| Steel Wool (0000 grade) | Applying wax or smoothing between coats | $5–$8 |
If you're planning a full refinish, you'll also want a wood sealant to protect against future moisture damage. For metal legs, our metal tarnish removal guide covers the specific products you'll need.
Step-by-Step Nightstand Leg Restoration
Follow these steps in order. Rushing the process—especially the drying times—will compromise the final result. Each step builds on the previous one, so patience is your most valuable tool.
- Step 1: Clean the Legs Thoroughly Before any repair, remove dirt, grease, and old polish. Use a damp cloth with mild soap, then dry completely. For sticky residue, refer to our sticky residue removal guide. Clean surfaces allow glue and finish to bond properly.
- Step 2: Tighten or Replace Loose Hardware Check every screw and bolt. Tighten them snugly—but don't overtighten, as this can strip the wood. If screws are stripped, fill the hole with wood glue and a wooden toothpick, let it dry, then re-drill and re-screw. For completely stripped holes, use a slightly larger screw or a threaded insert. If you need to replace hardware entirely, our hardware upgrade guide has you covered.
- Step 3: Repair Cracks and Splits For minor cracks, work wood glue into the gap using a thin brush or toothpick, then clamp tightly. Wipe away excess glue with a damp cloth before it dries. For larger splits, you may need to inject glue deeper and use a syringe. Let it cure for at least 24 hours.
- Step 4: Fill Gouges and Deep Scratches Use a stainable wood filler that matches your leg's color. Apply with a putty knife, overfilling slightly, then sand flush once dry. For surface-level scratches, a touch-up marker or wax stick is often sufficient. Our scratch touch-up guide details both methods.
- Step 5: Sand the Entire Leg Start with 120-grit to remove old finish and smooth rough areas, then progress to 220-grit for a smooth surface. If you're refinishing, finish with 400-grit for a professional feel. Always sand with the grain to avoid cross-grain scratches. Wipe away dust with a tack cloth.
- Step 6: Apply Stain or Paint (If Needed) If the wood is bare or discolored, apply a stain that matches your desired look. Use a foam brush or lint-free cloth, working in thin, even coats. For a complete walkthrough, see our nightstand restaining guide. If you prefer paint, our repainting guide covers preparation and application.
- Step 7: Seal with a Protective Finish Once the stain or paint is fully dry, apply a clear protective finish. Polyurethane is durable and water-resistant; lacquer dries fast; wax gives a soft, natural look. Apply at least two coats, sanding lightly with 0000 steel wool between coats. This step is critical for moisture protection and long-term durability.
- Step 8: Attach New Glides or Felt Pads Protect your floors and improve stability by adding fresh glides. Felt pads are best for wood and tile; plastic glides work well on carpet. Our felt pads guide explains how to choose and install them correctly.
- Step 9: Reassemble and Level Reattach the legs to the nightstand body. Once assembled, check for wobbles. If the table still rocks, adjust the glides or use shims. Our nightstand leveling guide walks you through the process step by step.
- Step 10: Final Inspection and Placement Run your hand over the restored legs—they should feel smooth and look uniform. Place the nightstand in its final position, ensuring it sits flat and stable. For optimal placement and symmetry, consult our nightstand placement guide.
Material-Specific Restoration Tips
Different materials require different approaches. Using the wrong technique can ruin the finish or cause further damage. Here's how to handle the most common nightstand leg materials:
🌳 Solid Wood Legs
Solid wood is the most forgiving material. It can be sanded, stained, and refinished multiple times. For oak, walnut, pine, or teak legs, always sand with the grain and use a stain that complements the natural tone. Our oak nightstand guide and walnut guide offer species-specific advice.
🔩 Metal Legs
Metal legs (iron, brass, aluminum) don't absorb stain. Instead, clean them thoroughly, remove rust or tarnish with fine steel wool, and apply a metal-specific paint or lacquer. Our metal tarnish removal guide covers brass and iron restoration in detail.
🪵 Engineered Wood Legs
Engineered wood (MDF, particleboard) has a thin veneer that can't be sanded aggressively. For scratches, use a touch-up marker. For deeper damage, wood filler is your best bet—but avoid over-sanding, which can burn through the veneer. See our engineered wood nightstands page for care tips.
Preventing Future Leg Damage
Restoration is only half the battle—prevention keeps your nightstand looking great for years. Here are the most effective strategies:
🛡️ Use Protective Pads
Felt or rubber pads on the bottom of each leg prevent scratches and reduce vibration. Replace them every 6–12 months. See our non-slip nightstand pads guide.
💧 Control Moisture
Wipe up spills immediately. Use coasters under drinks and avoid placing wet items directly on wood. Our coasters guide explains the best materials.
🧹 Dust Regularly
Dust acts like sandpaper over time. A quick weekly wipe with a microfiber cloth prevents micro-scratches. Learn more in our dust prevention guide.
☀️ Avoid Direct Sunlight
UV rays fade and dry out wood, leading to cracks. If your nightstand sits near a window, use curtains or apply a UV-protective finish. See our sun fade protection guide.
Recommended Products for Nightstand Leg Restoration
⚠️ AFFILIATE DISCLOSURE: This website contains affiliate links. As an affiliate Associate, we earn from qualifying purchases. If you make a purchase through these links, we may receive a small commission at no additional cost to you. Read our full affiliate policy.

Texphw Set of 4 Premium Square Wood Furniture Legs-Wooden Replacement Feet for Couch, Nightstand Sideboard Bench, Dresser Sofa with Installation Hardware (Brown 5" H*2.75" W)
Check price on Amazon
Couch Legs 6 Inch Heavy Duty Sofa Legs Wood Furniture Legs Feet Replacement, Wooden Square Couch Risers Mid Century Modern Furniture Legs for Armchair Recliner Table Dresser Sideboard Nightstand
Check price on Amazon
Tribesigns Wooden Nightstand with 3 Drawers, 31" Wide Night Stand with Metal Legs, Modern Large Bedside End Table for Bedroom, Living Room
Check price on Amazon
2Pcs Unfinished Wood Furniture Legs for Dressers, Nightstands | Hardwood Build, round Profile, Paintable Finish, for Living Rooms, Restoration, Makers and DIYers, Beige
Check price on Amazon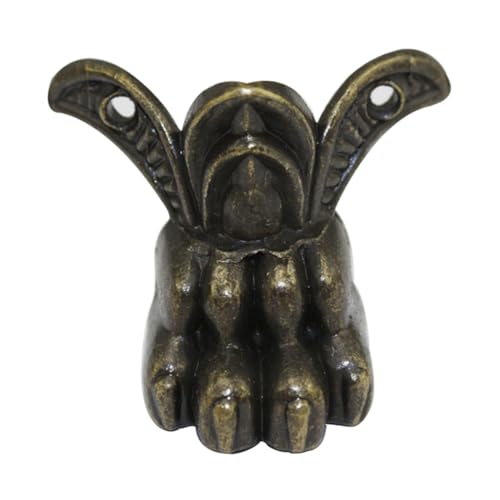
6pcs Claw-shaped Furniture Legs, Zinc Alloy Golden Height Adjustable | Boxes and Nightstands, Protects Floor, Vintage Claw-foot Look, Office Furniture Makeover, Restoration Hobbyists
Check price on Amazon
FOYTOKI Black Iron Furniture Support Feet Oblique Tapered Replacement Legs | Nightstands and Bathroom Cabinets, Restoration Projects, Under-sofa , Robot Vacuum Access, Increased Storage Space
Check price on Amazon
SEWACC Black Iron Furniture Support Legs, Oblique Tapered Cabinet Feet | Easy Installation, Improved Floor Cleaning Access, Suitable for Nightstands, Home Projects, Furniture Makers and Restoration
Check price on Amazon
Furniture Legs for Cabinets and Nightstands, 4Pcs Metal Feet 15cm | Iron Oblique Tapered Shape, Floor Protection Tips, Dust Resistant, Supports Restoration and Easier Cleaning
Check price on AmazonFrequently Asked Questions
Can I restore nightstand legs without sanding?
Yes, for minor scratches and scuffs, you can use a touch-up marker or wax stick without sanding. However, for deeper damage, a full refinish, or uneven color, sanding is necessary to create a smooth, uniform surface that accepts stain and finish properly.
How do I fix a wobbly nightstand leg that won't tighten?
If the screw won't tighten, the hole is likely stripped. Remove the screw, fill the hole with wood glue and a few toothpicks or a small wooden dowel, let it dry completely, then re-drill a pilot hole and re-insert the screw. For a permanent fix, consider installing a threaded insert. Our screw types guide can help you choose the right hardware.
What's the best finish for nightstand legs?
It depends on your priorities. Polyurethane offers the best durability and moisture resistance. Lacquer dries quickly and gives a professional look. Wax provides a natural, low-sheen finish but requires more frequent reapplication. For a detailed comparison, see our wood sealant guide.
How long does nightstand leg restoration take?
A basic repair (tightening screws, filling scratches) takes 1–2 hours plus drying time. A full refinish with sanding, staining, and sealing typically takes 2–3 days, mostly due to drying times between coats. Plan for at least 24 hours of cure time before placing items back on the nightstand.
Is it worth restoring cheap nightstand legs?
It depends on the material and construction. Solid wood legs are almost always worth restoring. Engineered wood or particleboard legs may not hold up to repeated repairs. If the legs are severely damaged or the hardware is failing, replacement might be more cost-effective. Our affordable nightstand picks can help you decide.
Final Thoughts
Nightstand leg restoration is a rewarding project that saves money, reduces waste, and gives you a deeper appreciation for your furniture. Whether you're fixing a wobbly leg, repairing a scratch, or completely refinishing a vintage piece, the steps in this guide will help you achieve professional results. For more advanced restoration projects, explore our vintage nightstand restoration guide. And if you're considering an upgrade instead, our shopping and reviews hub has you covered.