
Nightstand Assembly Guide: Build It Right the First Time
Master the art of nightstand assembly with our comprehensive step-by-step guide. From unboxing to final placement, learn the tools, techniques, and pro tips to assemble any bedside table safely and securely.
Start AssemblingAssembling a new nightstand can feel daunting, especially if you're not a seasoned DIY enthusiast. However, with the right approach and a bit of patience, it's a straightforward project that most people can complete in under an hour. Whether you've purchased a modern nightstand with sleek lines or a rustic nightstand with solid wood construction, the fundamental assembly principles remain the same.
This guide will walk you through every stage of the process, from preparing your workspace to applying the finishing touches. We'll also cover common pitfalls to avoid and answer frequently asked questions. By the end, you'll have a sturdy, well-assembled nightstand that's ready to serve as the foundation of your bedside setup.
Preparation: Tools and Workspace
Before you begin, gathering the right tools and creating a suitable workspace will save you time and frustration. Most nightstands come with basic hardware and an Allen wrench, but having a few extra tools on hand makes the job easier.
Essential Tools Checklist
- Phillips-head screwdriver – For most screws included with furniture.
- Flat-head screwdriver – Useful for prying or adjusting.
- Allen wrench (hex key) – Usually included, but have a set if possible.
- Rubber mallet – For tapping wooden dowels or joints without damaging the finish.
- Adjustable wrench or pliers – For tightening bolts.
- Utility knife or scissors – To open packaging.
- Measuring tape – To verify dimensions and spacing.
- Level – To ensure the nightstand sits flat.
- Wood glue – Optional, but adds strength to wooden joints.
- Furniture felt pads – To protect your floor and reduce noise.
💡 Pro Tip: Before buying a nightstand, check the nightstand spec glossary to understand what assembly level to expect. Some models are fully assembled, while others require minimal or full assembly.
Setting Up Your Workspace
Choose a clean, flat surface with plenty of room to spread out parts. A large table or a section of floor covered with a soft blanket or cardboard works well. The soft surface prevents scratches on the nightstand's finish and makes it easier to handle components.
Good lighting is also crucial. If possible, work in a well-lit area or use a portable lamp to see small screws and holes clearly. Keep a small container, like a bowl or muffin tin, to hold screws and small parts so they don't get lost.
Unboxing and Inventory
Carefully open the packaging and remove all components. Lay them out on your workspace. Check each piece against the parts list in the instruction manual. If anything is missing or damaged, contact the manufacturer before proceeding.
Separate the hardware (screws, bolts, dowels, cam locks) into groups. This will make the assembly process much smoother. Many nightstands come with labeled bags or a blister pack, which helps identify each type of fastener.
💡 Pro Tip: Take a photo of the hardware layout before you start. If you get confused later, you can refer back to the photo. Also, keep the instruction manual handy — even if you're experienced, it's easy to miss a step.
If your nightstand uses cam locks or special connectors, take a moment to understand how they work. These are common in engineered wood nightstands and can be tricky if you've never encountered them. The nightstand screw types guide on our site explains the most common fasteners in detail.
Step-by-Step Nightstand Assembly
Every nightstand is different, but the general sequence of assembly is similar. Below is a typical order of operations. Always refer to your specific manual for exact steps.
Step 1: Prepare the Sides and Back Panel
Identify the left and right side panels. If your nightstand has a back panel, lay it flat with the finished side facing down. Attach the side panels to the back using the specified screws or cam locks. Do not fully tighten screws yet — leave them slightly loose to allow for adjustments.
Step 2: Attach the Bottom Panel
Slide the bottom panel into the grooves or attach it to the sides using the provided hardware. This piece often provides structural stability. Again, tighten screws only finger-tight at this stage.
Step 3: Install Drawer Runners (If Applicable)
If your nightstand has drawers, attach the drawer runners to the side panels. Ensure they are level and aligned. For models with soft-close drawers, follow the manufacturer's instructions carefully, as these mechanisms require precise alignment.
Step 4: Assemble Drawers
Assemble the drawer boxes by connecting the sides, front, and back. If your nightstand uses dovetail joints, they should fit together snugly. For stapled or screwed drawers, use the provided hardware. Attach the drawer slides to the drawer box, then slide the drawers into the nightstand to test the fit.
Step 5: Attach the Top
Place the top panel on the assembled base. Align it carefully and secure it with screws from underneath. This is a good time to check that everything is square and level.
Step 6: Install Legs or Base
If your nightstand has separate legs, attach them now. For floating nightstands, you'll instead install the wall-mounting bracket. For tall nightstands, ensure the legs are securely fastened to prevent wobbling. The nightstand leg styles guide can help you identify your leg type.
Step 7: Attach Hardware (Handles, Knobs)
Install drawer handles or knobs using the pre-drilled holes. If your nightstand has specialty handles, make sure they are oriented correctly and tightened securely. This is also the time to attach any decorative elements.
Step 8: Final Tightening and Adjustments
Go back and tighten all screws and bolts. Check that drawers open and close smoothly. If your nightstand has adjustable levelers, use them to ensure it sits flat on the floor. A level nightstand prevents wobbling and extends the life of the furniture.
💡 Pro Tip: For wooden nightstands, applying a small amount of wood glue to dowels and joints before assembly can significantly increase durability. However, avoid glue if you might need to disassemble it later.
Common Nightstand Assembly Mistakes to Avoid
Even with good instructions, it's easy to make mistakes. Here are the most common ones and how to avoid them:
- Over-tightening screws: This can strip the screw holes or crack the wood. Tighten until snug, but don't force it.
- Ignoring the sequence: Assembling out of order can make it impossible to fit certain parts. Follow the manual's sequence.
- Not checking for squareness: An un-square nightstand will wobble and have misaligned drawers. Measure diagonals to ensure the frame is square.
- Misplacing hardware: Using the wrong screw in the wrong hole can damage the nightstand. Keep hardware organized.
- Skipping the anti-tip strap: For safety, especially with tall nightstands, always install the anti-tip strap. The nightstand anti-tip straps guide explains how.
If you encounter a problem during assembly, don't force it. Re-read the instructions and check that you're using the correct parts. The nightstand buying mistakes guide also covers assembly-related issues to watch out for.
Assembly Time and Difficulty by Nightstand Type
Assembly time varies depending on the nightstand's complexity and your experience. Here's a general guide:
| Nightstand Type | Estimated Time | Difficulty |
|---|---|---|
| Simple open shelf nightstand | 15–30 minutes | Easy |
| Single drawer nightstand | 30–45 minutes | Easy to Moderate |
| Two-drawer nightstand | 45–60 minutes | Moderate |
| Three-drawer nightstand | 1–1.5 hours | Moderate |
| Charging nightstand | 1–1.5 hours | Moderate to Advanced |
These times are estimates for one person. Having a second person to help hold panels can cut the time significantly, especially for larger nightstands.
Safety and Stability After Assembly
Once your nightstand is assembled, take a few final steps to ensure it's safe and stable:
- Check stability: Gently push the nightstand from different sides. It should not wobble. If it does, adjust the levelers or tighten screws.
- Install anti-tip hardware: If your nightstand is tall or heavy, secure it to the wall using the included anti-tip kit. This is especially important in homes with children or pets.
- Add felt pads: Place nightstand felt pads under the legs to protect your floor and reduce noise when moving.
- Level the nightstand: Use a level to check that the top is flat. Adjust leg levelers as needed. The nightstand leveling guide has detailed instructions.
Proper assembly also sets the stage for easier maintenance. Once assembled, refer to our nightstand care and maintenance hub for tips on keeping your nightstand in top condition.
Placing Your Assembled Nightstand
Now that your nightstand is built, it's time to position it. The ideal placement is within easy reach of your bed, typically 24–30 inches from the mattress edge. For symmetry, place one nightstand on each side of the bed if space allows.
Consider the height: the nightstand top should be roughly level with the mattress top or slightly lower for comfortable access. Our nightstand placement guide provides detailed measurements and tips. If you have a rug, check the rug placement bedside guide to ensure proper positioning.
Once placed, style your nightstand with a bedside table lamp, a catchall tray, and perhaps a book holder. For cable management, consider bedside cable management solutions to keep cords tidy.
Recommended Nightstands for Easy Assembly
⚠️ AFFILIATE DISCLOSURE: This website contains affiliate links. As an affiliate Associate, we earn from qualifying purchases. If you make a purchase through these links, we may receive a small commission at no additional cost to you. Read our full affiliate policy.

Kingrol 20 Plastic Drawer Slide Track Guides for Center Mount Drawers - Replacement Parts for Dressers, Nightstands, and Kenlin/Rite-Trak 1 Drawer Systems
Check price on Amazon
The Art of 64-Bit Assembly, Volume 1: x86-64 Machine Organization and Programming
Check price on Amazon
The Complete x86 64 Assembly Programming Guide: Master Registers, Instructions, Memory, Calling Conventions, SIMD, System Programming, Debugging, and ... Optimization (The Cyber & System War Room)
Check price on Amazon
Programming with 64-Bit ARM Assembly Language: Single Board Computer Development for Raspberry Pi and Mobile Devices
Check price on Amazon
X86 Assembly from Scratch: From Basics to Advance Techniques for Modern Systems (programming)
Check price on Amazon
64-bit assembly programming for Linux: The easy guide to get started
Check price on Amazon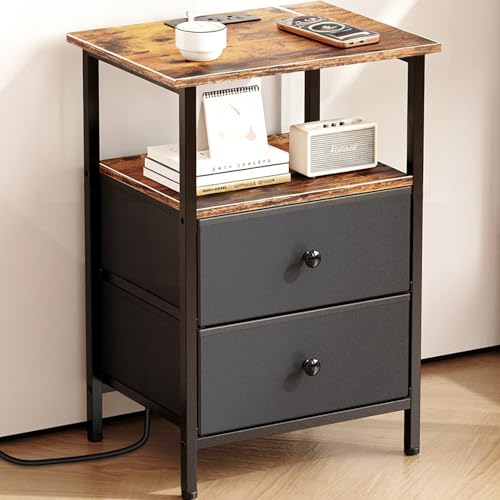
Smoproper Nightstand with Charging Station, Bedside End Table with 2 Fabric Drawers for Bedroom, Side Table with USB Ports and Outlets (Brown Black)
Check price on Amazon
x64 Assembly Language Step-by-Step: Programming with Linux (Tech Today)
Check price on AmazonFrequently Asked Questions About Nightstand Assembly
How long does it take to assemble a nightstand?
Most nightstands take between 30 minutes to 1.5 hours to assemble, depending on the number of drawers and complexity. Simple open-shelf models can be done in 15–30 minutes.
Do I need special tools to assemble a nightstand?
Most nightstands come with the necessary Allen wrench and hardware. A Phillips screwdriver, rubber mallet, and level are helpful extras. For specialty screws, you may need a specific driver.
What if my nightstand arrives damaged or missing parts?
Contact the manufacturer or retailer immediately. Most companies will send replacement parts free of charge. Keep the packaging until assembly is complete in case you need to return it.
Should I use wood glue during assembly?
Wood glue can strengthen joints, especially for wooden dowels. However, it makes disassembly difficult. Use glue only if you're sure you won't need to take it apart. For most modern nightstands with cam locks, glue is not necessary.
How do I prevent my nightstand from wobbling?
Ensure all screws are tightened, check that the frame is square, and use adjustable levelers if available. Adding non-slip nightstand pads can also help. The nightstand leveling guide has more tips.
Can I assemble a nightstand by myself?
Yes, most nightstands can be assembled by one person. However, having a second person to hold panels in place can make the process faster and easier, especially for larger pieces.
Final Thoughts
Assembling a nightstand is a manageable DIY project that anyone can tackle with the right preparation and mindset. By following the steps in this guide, avoiding common mistakes, and taking your time, you'll end up with a sturdy, functional piece of furniture that enhances your bedroom.
Remember, if you're still in the market for a nightstand, our nightstand starter hub is the perfect place to begin your research. For those looking to upgrade their bedside setup, explore our shopping and reviews hub for curated recommendations. And once your nightstand is assembled, keep it looking great with our care and maintenance guides.
Happy assembling!